Post by Jez on Aug 10, 2016 2:50:08 GMT -5
I recall asking a few months ago if anybody would be interested if I did a shading tutorial, so here I am, showing everybody how I shade my pictures. Please note that, as with all tutorials, this is just my personal preference for doing it and it in no way is intended to tell anybody that they must follow my method.
I will be using Paint.NET and GIMP for this tutorial, but you may use any editor you like as long as it has the capability to use layers and a dodge/burn tool.
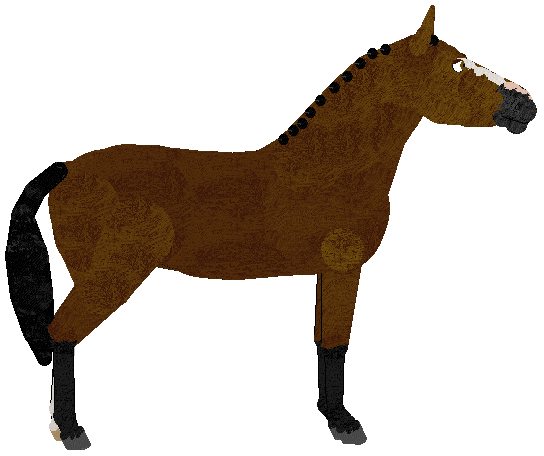
My Warmblood mare Mina will be our model for this demonstration, because she is on a Manda v1 mod and so is pretty unique and she's the cutest and the best horse and I don't give her nearly enough attention so it's only fair. This is the photo I will be using to make a Novice In-Hand photo for her:
First, we want to make the background transparent. You don't have to do this as it's not required in In-Hand, but I think it makes my pics look fancier. So we will select the white parts of the picture with the magic wand (or select by color feature in GIMP) like so:
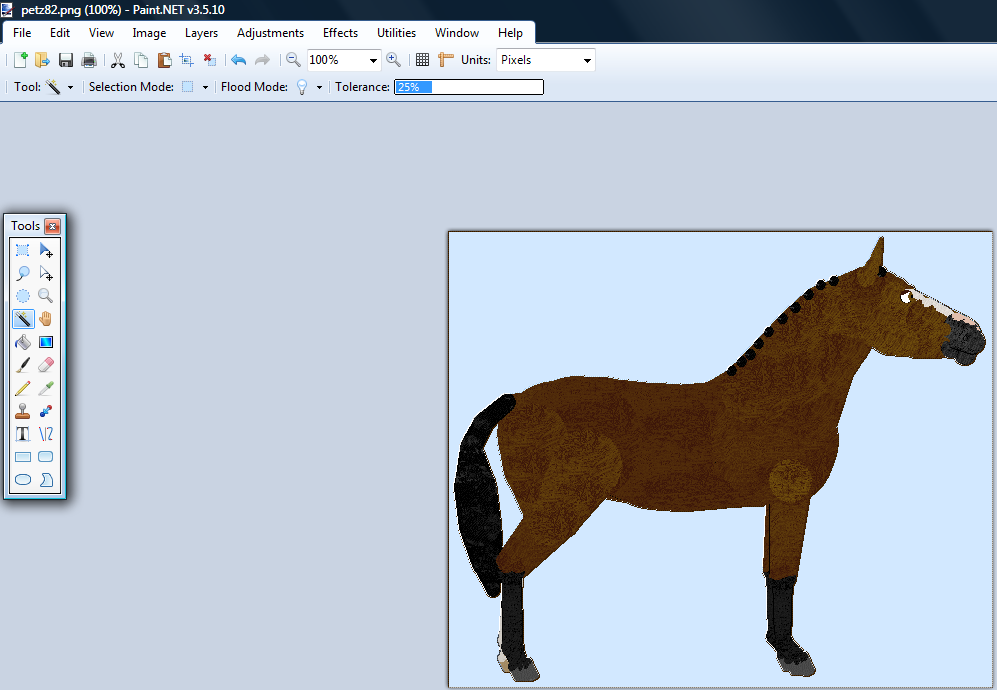
Note: be careful that the selection threshold isn't set too high, or it might select the white markings on your horse if it has any! By default, paint.net's threshold is 50%, way too high. I've lowered mine to 25%, but you can go lower, and in fact, it's recommended you set it as low as 5% if you're working with a horse that has a lot of blank white spots as part of a texture, internal or external.
And erase them, so that you are left with this:
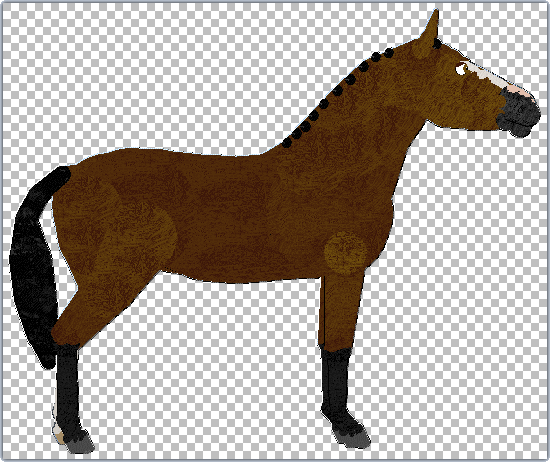
Now the photo should be transparent and you should be left with an outline around the horse from your previous selection. If not, just re-select the transparent areas. Now invert your selection so that the entire inside boundary lines of the horse should be selected. Here's where the fun with shading begins.
Being careful not to deselect the inverted selection, make a new layer on top of the horse. Then select your paintbrush or pencil tool and set it to a reasonable pixel size. For full-size horses, I usually go with a pixel size of 3. For ponies I use 2, and I'm sure on a large draft horse I wouldn't object to using a brush size of 4 pixels. Mina is a regular-sized horse, so I will use 3. You can refer to pictures of real horses for ideas of where to draw your shadows. I generally like my horses to look work-fit, but usually not bulging with a ton of extra muscle mass. But others may prefer different looks. It's all up to personal preference. When you're done, it should look a little something like this:
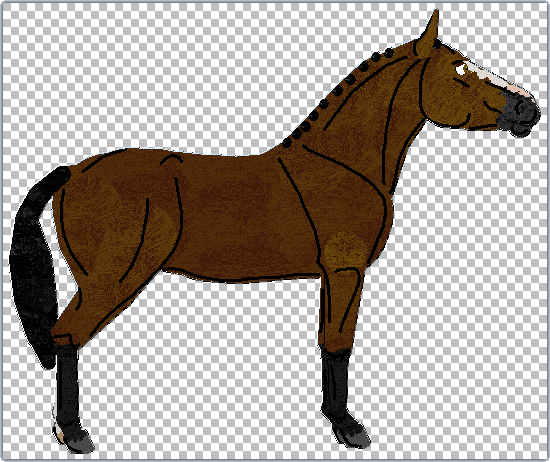
Now to blur the lines to add more depth to the horse. I prefer to use the guassian blur tool for paint.net and gimp alike, at a radius of between 8 to 15. I went with 12 or 13 on this pic. You can also mess around with the layer opacity if you want your shading to look a little less dramatic. I just like having a little room for error when I go to add highlights to be able to lighten a really dark spot without making all kinds of streak marks.
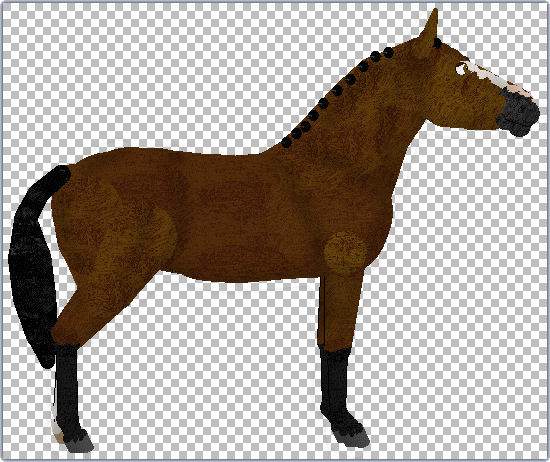
That is as far as I go in Paint.NET. I save the image with a .pdn AND .png copy, just in case something goes wrong with the flattened pic, I can back up and still tweak the .pdn file if I need to. Next comes adding highlights, but you can easily refer back to Haybenny's shading tutorial for info on how to do that. I follow her method there, though I tend to set my brush opacity and exposure much higher and I only go as low as 20 and 10 percent and as high as 40 and 30, or 60 and 40 in extreme cases (usually with horses that use a lot of darker-colored external textures.)
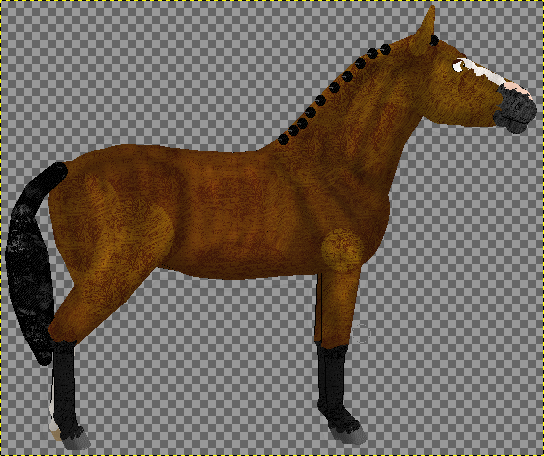
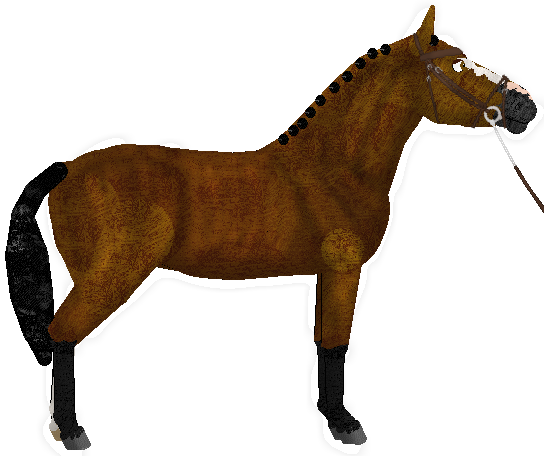
Save your pic, then, just add tack and you're good to go!
I will be using Paint.NET and GIMP for this tutorial, but you may use any editor you like as long as it has the capability to use layers and a dodge/burn tool.
My Warmblood mare Mina will be our model for this demonstration, because she is on a Manda v1 mod and so is pretty unique and she's the cutest and the best horse and I don't give her nearly enough attention so it's only fair. This is the photo I will be using to make a Novice In-Hand photo for her:

First, we want to make the background transparent. You don't have to do this as it's not required in In-Hand, but I think it makes my pics look fancier. So we will select the white parts of the picture with the magic wand (or select by color feature in GIMP) like so:

Note: be careful that the selection threshold isn't set too high, or it might select the white markings on your horse if it has any! By default, paint.net's threshold is 50%, way too high. I've lowered mine to 25%, but you can go lower, and in fact, it's recommended you set it as low as 5% if you're working with a horse that has a lot of blank white spots as part of a texture, internal or external.
And erase them, so that you are left with this:

Now the photo should be transparent and you should be left with an outline around the horse from your previous selection. If not, just re-select the transparent areas. Now invert your selection so that the entire inside boundary lines of the horse should be selected. Here's where the fun with shading begins.
Being careful not to deselect the inverted selection, make a new layer on top of the horse. Then select your paintbrush or pencil tool and set it to a reasonable pixel size. For full-size horses, I usually go with a pixel size of 3. For ponies I use 2, and I'm sure on a large draft horse I wouldn't object to using a brush size of 4 pixels. Mina is a regular-sized horse, so I will use 3. You can refer to pictures of real horses for ideas of where to draw your shadows. I generally like my horses to look work-fit, but usually not bulging with a ton of extra muscle mass. But others may prefer different looks. It's all up to personal preference. When you're done, it should look a little something like this:

Now to blur the lines to add more depth to the horse. I prefer to use the guassian blur tool for paint.net and gimp alike, at a radius of between 8 to 15. I went with 12 or 13 on this pic. You can also mess around with the layer opacity if you want your shading to look a little less dramatic. I just like having a little room for error when I go to add highlights to be able to lighten a really dark spot without making all kinds of streak marks.

That is as far as I go in Paint.NET. I save the image with a .pdn AND .png copy, just in case something goes wrong with the flattened pic, I can back up and still tweak the .pdn file if I need to. Next comes adding highlights, but you can easily refer back to Haybenny's shading tutorial for info on how to do that. I follow her method there, though I tend to set my brush opacity and exposure much higher and I only go as low as 20 and 10 percent and as high as 40 and 30, or 60 and 40 in extreme cases (usually with horses that use a lot of darker-colored external textures.)

Save your pic, then, just add tack and you're good to go!


 It's been a great help.
 another guide to my list
