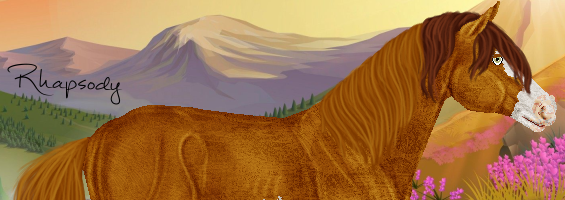
How To Add Tack with GIMP (by Pollution)
Mar 10, 2019 14:20:22 GMT -5
Pollution and mymistica like this
Post by Jewellz on Mar 10, 2019 14:20:22 GMT -5
Before this gets completely lost I thought I'd post it here. Anyone who doesn't know how to add tack yet, this is for you! Thanks Pollution !
 Step 1: Bring up GIMP and go to File>New and I usually make my dimensions 800x800 or bigger (you can crop this later of course, just making it big to make sure you have enough space for any tack/riders/equipment you would like to add.
___________________
Step 2: Go to your Layers-Gradients toolbar and right-click the background layer and select 'Add Alpha Channel'. Then select the 'Color Select' tool from the Toolbox and click your image to where there is a flashing dotted line around the border. Then click the Edit tab and click 'Cut', after that click the Select tab and click 'None'.
___________________
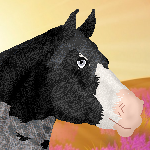
Step 3: Go to File and Open as Layers. Select your Horse image, right click the horse layer like you did the background and add alpha channel. Then use the Bucket Fill tool and fill in the white with a unnatural color (I use bright green), then color select and cut, and then select none.

Full Size
Step 4: Now for tack! Open your tack 'open as layers.' Then use the eraser tool to erase the tack you do not want to use! if it's in a weird position you can use the rotate tool from the toolbox. Though be wary that the more you rotate the more blurry the tack layer will become (i'm not sure how to get around this)
+
Step 5: if tack doesnt fit zoom in really close and use the paintbrush tool at size 1 so it's just a pixel and match the tack color, lengthen the tack by drawing by pixel for best results!

Full Size
Step 6: Do this for all of your tack then go to File and export image as a .png file; and you're done!
I'm not very great at explaining but hopefully this helps! if you have questions or if you're confused let me know!

___________________
Step 2: Go to your Layers-Gradients toolbar and right-click the background layer and select 'Add Alpha Channel'. Then select the 'Color Select' tool from the Toolbox and click your image to where there is a flashing dotted line around the border. Then click the Edit tab and click 'Cut', after that click the Select tab and click 'None'.
___________________
Step 3: Go to File and Open as Layers. Select your Horse image, right click the horse layer like you did the background and add alpha channel. Then use the Bucket Fill tool and fill in the white with a unnatural color (I use bright green), then color select and cut, and then select none.
Full Size
Step 4: Now for tack! Open your tack 'open as layers.' Then use the eraser tool to erase the tack you do not want to use! if it's in a weird position you can use the rotate tool from the toolbox. Though be wary that the more you rotate the more blurry the tack layer will become (i'm not sure how to get around this)
+
Step 5: if tack doesnt fit zoom in really close and use the paintbrush tool at size 1 so it's just a pixel and match the tack color, lengthen the tack by drawing by pixel for best results!
Full Size
Step 6: Do this for all of your tack then go to File and export image as a .png file; and you're done!
I'm not very great at explaining but hopefully this helps! if you have questions or if you're confused let me know!